
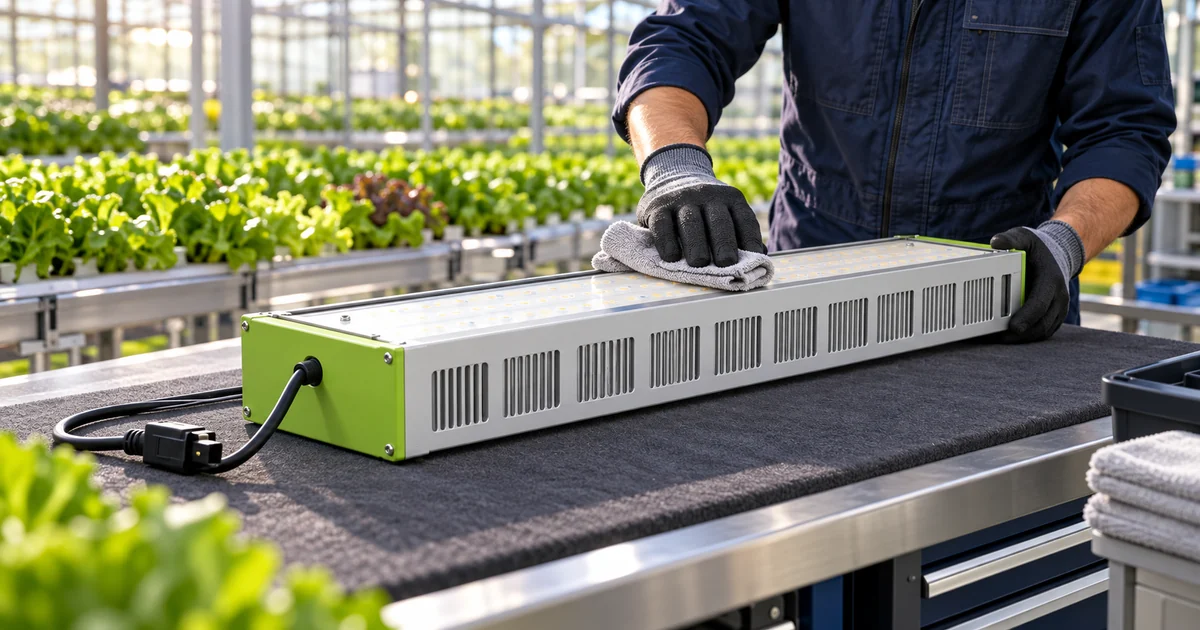
LED grow light maintenance should preserve safe operation and repeatable crop-level light delivery. Keep fixtures and sensors clean using their own approved instructions, inspect accessible mounting and cable condition, and compare measurements with a documented baseline. Investigate persistent changes before adjusting output, and use qualified service personnel for electrical faults or internal equipment work.
LED grow light maintenance is an operating process, not a promise that a long-life fixture needs no attention. In a commercial greenhouse, deposits, changed crop geometry, sensor condition and control settings can all affect the apparent light level. A useful program checks these causes separately and records what each intervention changed.
This guide presents seven checks for growers and facilities teams. Suggested inspection timing and worked examples are MarsEVOL planning recommendations, not universal cleaning intervals, product warranties or evidence of performance at a customer installation.
Key Takeaways
- Maintain the measuring instrument before evaluating the fixture.
- Use the same geometry and operating state when comparing light levels over time.
- Follow model-specific cleaning and service instructions; do not infer a washing method from an IP label.
- Separate optical recovery, control changes and component failures in the maintenance record.
What should LED grow light maintenance measure?
Track delivered light and equipment condition under comparable conditions. A lower sensor reading is a signal to investigate, not proof that the LED packages have degraded. Start with a clean, stable reference record that includes the installed geometry and settings.
1. Preserve the original operating baseline
Keep fixture IDs, driver variants, zone assignments, mounting heights, operating hours and the commissioning survey. Retain both raw readings and a diagram showing the coordinates. The PPFD mapping guide provides a method for organizing repeatable surveys.
Select a small set of accessible reference positions for interim checks, including an edge and a central location. A repeated subset can detect a trend, but it does not replace a full map after a layout change. Use the same fixture command, screen position and measurement height each time, preferably with negligible daylight.
Store actual readings as well as percentages. If a dimming setting changes, label the new condition instead of blending it into the old trend. Review the distinction between PPFD and daily light integral before interpreting a short survey as a full day’s crop exposure.
2. Keep the sensor trustworthy
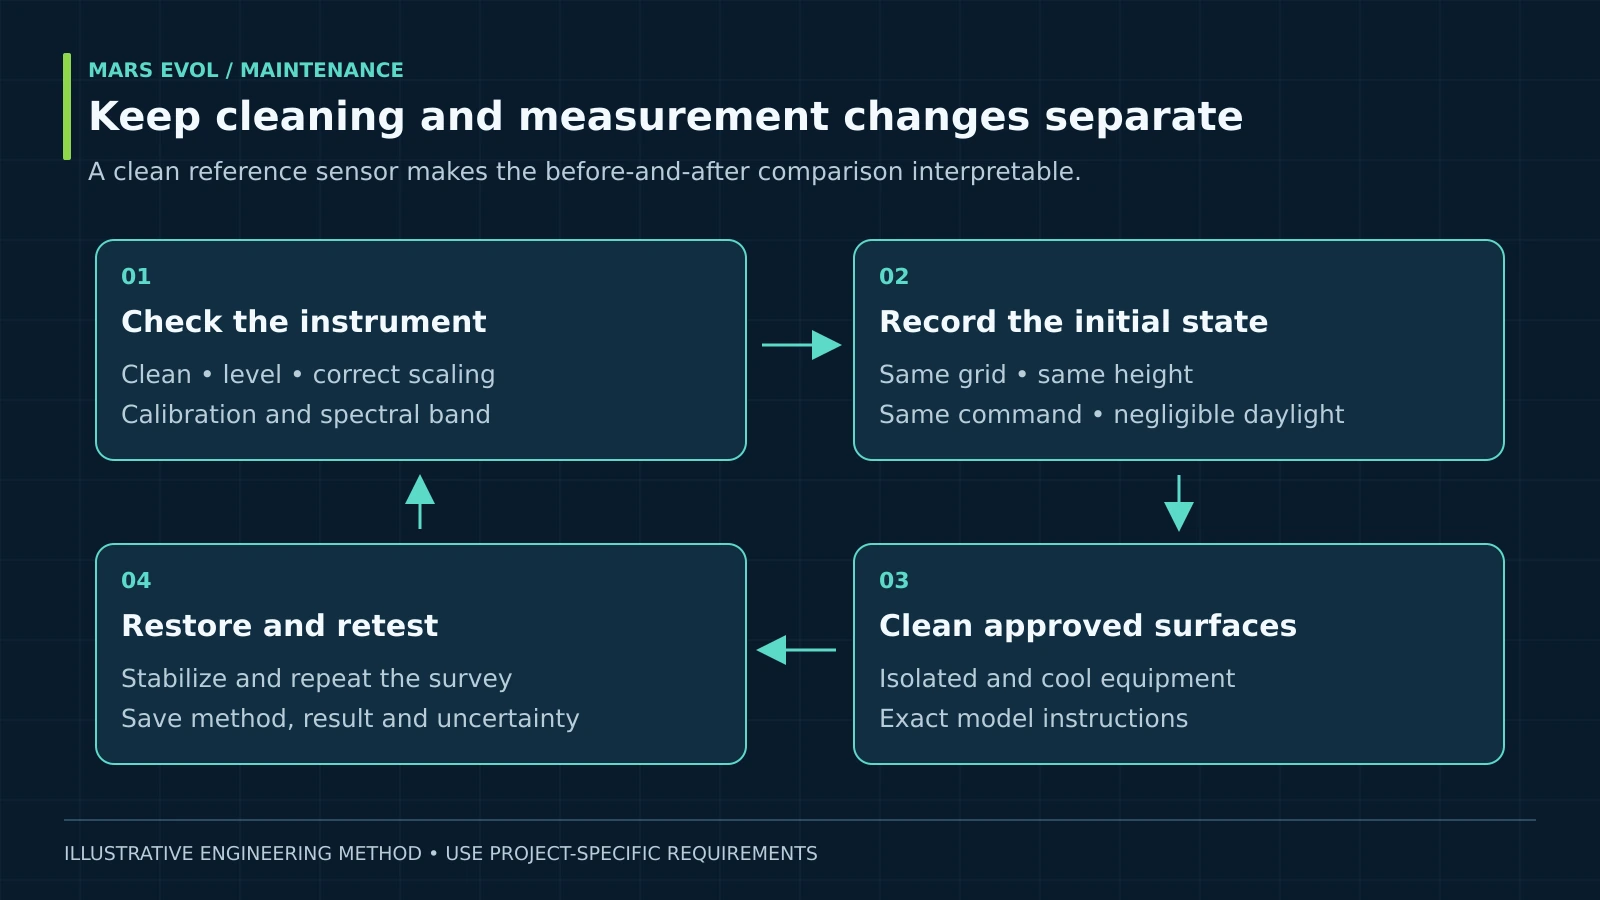
Check leveling, cleanliness, cable condition, logger units and calibration status before collecting comparison data. Apogee identifies moisture, debris and deposits on an upward-looking sensor as possible causes of low readings.[1] Clean the reference instrument first so later fixture cleaning is not confused with improved sensor transmission.
Use the instructions for that exact sensor. LI-COR warns that pressure or scratches on the diffuser can impair its angular response, and recommends factory calibration every two years for the LI-190R and LI-191R after field deployment.[2][3] That interval should not be generalized to every brand or sensing technology.
Document calibration changes when comparing old and new records. If a replacement sensor reads differently, compare instruments under stable conditions before attributing the difference to the fixtures. Recheck permanent PAR sensor placement as crops grow or nearby equipment moves.
Which cleaning checks belong in LED grow light maintenance?
Use the manufacturer’s approved procedure for the exact model, with safe access and the required electrical isolation. Greenhouse sanitation practices for floors, benches or glazing are not automatically suitable for lighting optics, seals or connectors.
3. Inspect accessible external condition
Look for deposited material, discolored optics, damaged external cables, missing connector caps, loose suspension, corrosion and blocked heat-dissipation surfaces. Inspect from a safe position; arrange proper access equipment when a closer check is needed. Record photographs and the fixture location rather than simply marking the entire bay “checked.”
Remove visibly damaged or suspect equipment from service through the site’s authorized procedure. Condensation inside an enclosure, repeated protective trips or damaged insulation require service investigation. Repeated resets are not a maintenance strategy.
The published SOLIFY PRO manual specifies qualified electrical installation and describes model-dependent connections; it also states that the LED light sources are not serviceable or replaceable by the user.[7] Do not turn a visual inspection into an internal repair. Identify the exact product and service route first.
4. Clean without creating another fault
Obtain written guidance on permitted cloths, liquids, chemical concentrations, contact time, rinse method and drying conditions where applicable. If those details are absent, ask the manufacturer before applying a new cleaner. Never assume a sensor’s approved cleaning chemical is appropriate for a fixture lens.
A protection rating does not by itself specify an unrestricted pressure-washing or chemical-sanitation procedure. Check the assembled product, its connectors and the stated operating conditions. Resolve inconsistent descriptions against the supplied model’s documentation instead of selecting whichever claim allows the most aggressive cleaning.
Plan an isolated, cooled maintenance window. In U.S. workplaces, OSHA distinguishes an off command from the disconnection and lockout practices needed for electrical work.[6] Qualified personnel should manage the electrical boundary and authorize return to service. This article does not provide instructions for opening energized equipment.
Keep cleaning stages separate in the record: inspect the sensor, establish the pre-clean reading, clean the permitted fixture surfaces, restore the approved operating state, allow stabilization and retest. If glazing and fixtures are cleaned together, record both; the result cannot isolate the contribution of either action.
How much light did cleaning restore?
Calculate the change from paired measurements, and state which denominator each percentage uses. The following LED grow light maintenance example assumes an unchanged equal-area grid, negligible daylight, the same clean calibrated sensor, stable temperature and the same operating command.
| Survey condition | Mean PPFD, μmol·m⁻²·s⁻¹ | Fraction of initial baseline |
|---|---|---|
| Initial clean baseline | 200 | 100% |
| Before fixture cleaning | 170 | 85% |
| After approved cleaning | 190 | 95% |
Before-clean retention = 170 ÷ 200 × 100 = 85%
After-clean retention = 190 ÷ 200 × 100 = 95%
These are field PPFD ratios for one fixed geometry, not laboratory photon-flux maintenance ratings.
Relative increase = (190 − 170) ÷ 170 × 100 ≈ 11.8%
The baseline-relative result improves by 10 percentage points; the increase over 170 is 11.8%.
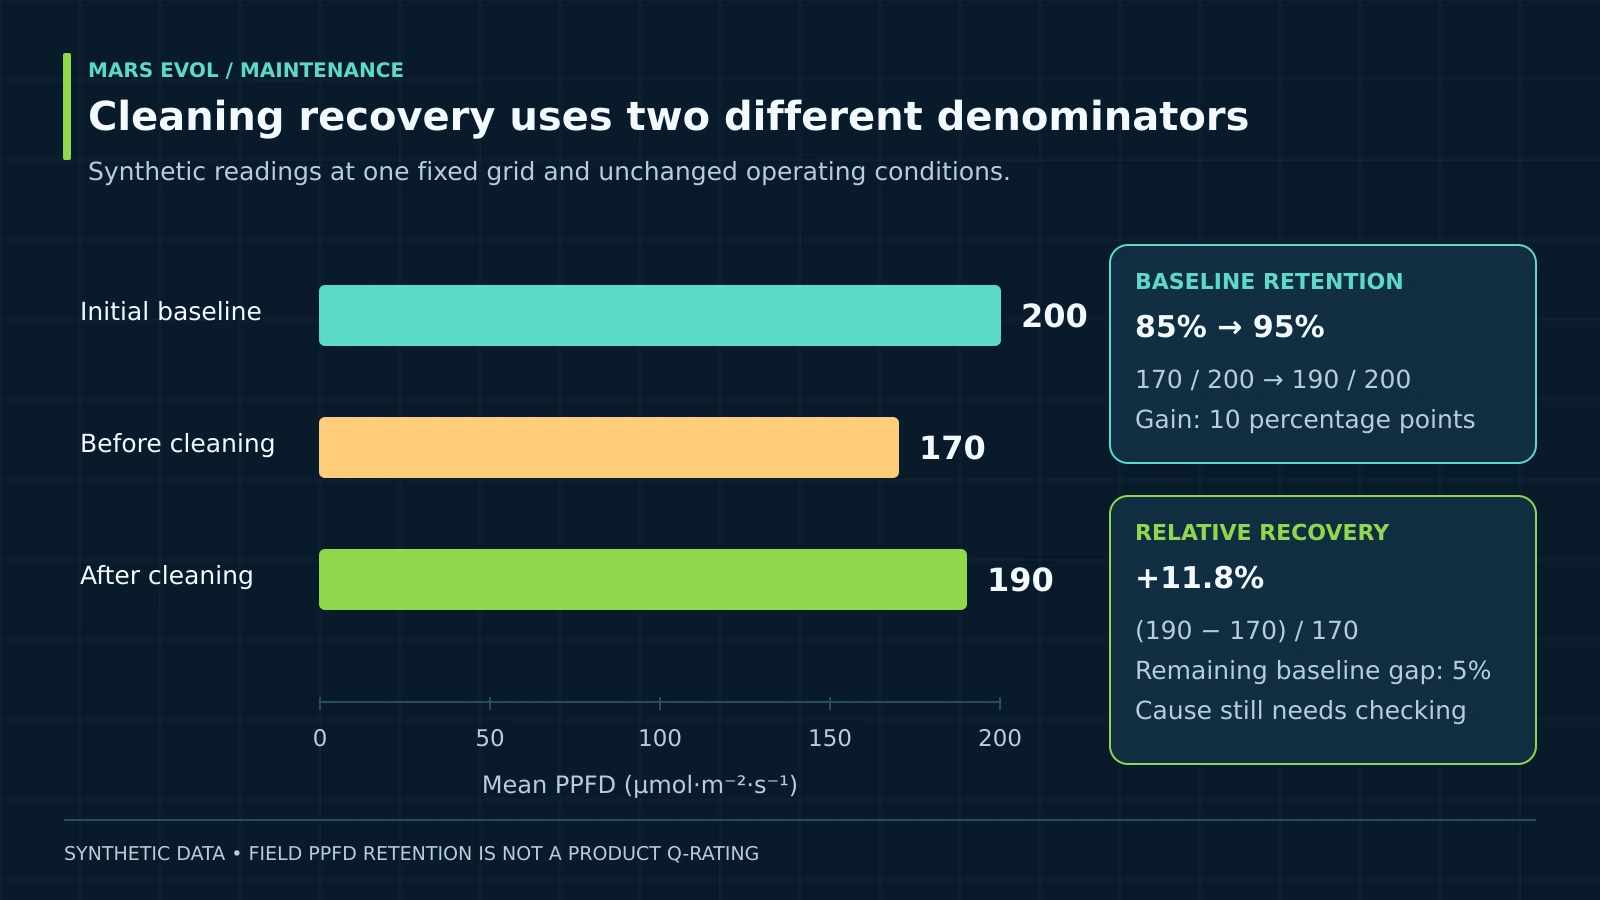
The observed recovery is 20 μmol·m⁻²·s⁻¹. At a constant twelve-hour operating period, this corresponds to an additional 0.864 mol·m⁻²·d⁻¹ of electric-light DLI at the surveyed plane. It does not establish a proportional crop-yield increase, and the recorded uncertainty must be small enough to resolve the change.
Additional DLI = 20 × 12 × 3,600 ÷ 1,000,000 = 0.864 mol·m⁻²·d⁻¹
Assumes the measured difference persists throughout the twelve hours.
The remaining five-percent difference from the initial baseline is not automatically LED aging. Check repeatability, calibration history, mounting, spectrum settings, electrical operating state and residual deposits. If the uncertainty or changed conditions are comparable to the apparent loss, the evidence does not support a precise degradation claim.
When should equipment be serviced or replaced?
Escalate persistent, reproducible changes or physical defects after basic measurement and configuration checks. Choose the service action from the diagnosed cause, the manufacturer’s permissions and the effect on the crop area.
5. Check thermal conditions and control history
Record ambient conditions and inspect whether surrounding material or changed equipment has obstructed the intended heat-dissipation space. Compare with the model’s permitted environment. Do not attach improvised cooling hardware or override protective behavior as a maintenance shortcut.
Review schedules, overrides, firmware changes and dimming commands alongside light readings. An intentional reduction in commanded output can look like a maintenance problem. Use the control-system guide to document the configured interface, and check mounting height and spacing after any physical adjustment.
6. Distinguish lifetime evidence from a field trend
The U.S. Department of Energy’s luminaire lifetime guidance explains that LED package lumen maintenance alone does not establish complete luminaire lifetime; drivers, optics and other components also matter.[4] This system-level distinction remains useful, but the general-lighting document is not a greenhouse photon-output warranty.
DLC V4.0 separately addresses photosynthetic photon-flux maintenance and driver lifetime evidence.[5] A laboratory maintenance claim describes specified test and projection conditions. A field PPFD ratio additionally includes layout, optics, control state and measurement effects. Avoid labeling the example’s 95% field result as a product Q95 rating.
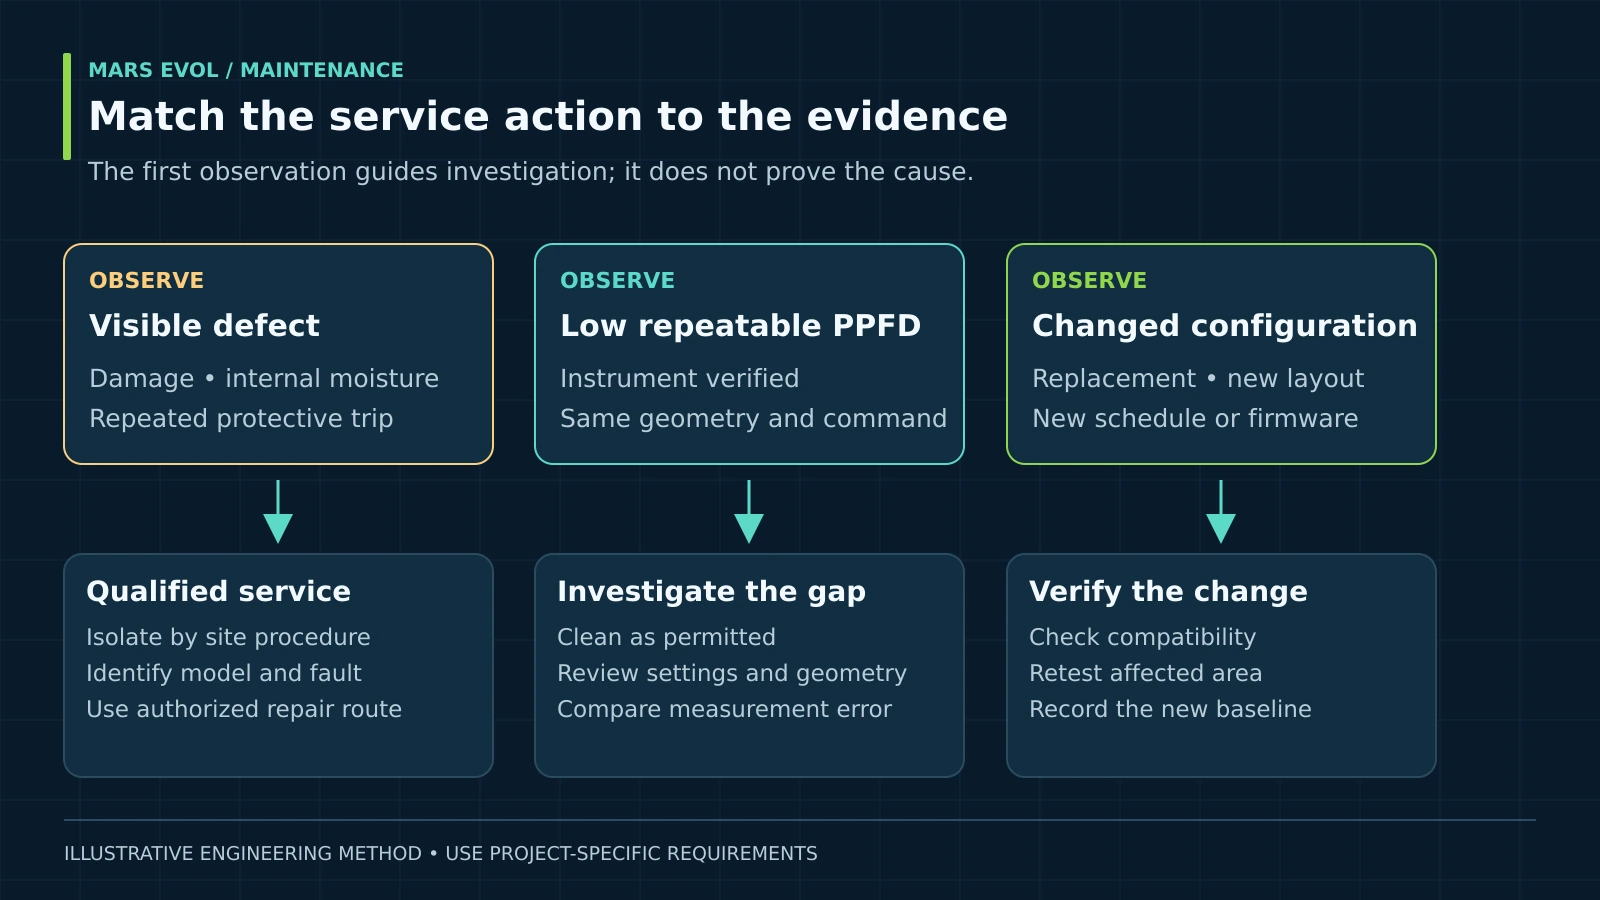
For replacement, match the approved optical distribution, spectrum, electrical rating, dimming behavior and mounting arrangement. An equally rated wattage is insufficient. Retest the affected area after installation, because mixing replacement variants can change uniformity or the relationship between command and light.
How do you schedule LED grow light maintenance?
Start with the manufacturer’s requirements, then adjust inspection frequency using observed conditions and records. LED grow light maintenance in a dusty propagation area may need a different cadence from a clean research bay; this guide does not prescribe one fixed cleaning interval.
7. Assign actions, owners and review triggers
| When to review | Suggested check | Record or trigger |
|---|---|---|
| During routine operator rounds | Alarms, dark fixtures and visible damage | Location and timestamp; escalate defects |
| At a site-defined inspection interval | Sensor condition and reference readings | Same-state trend and visible deposit level |
| At an approved maintenance window | Permitted cleaning and accessible condition inspection | Before/after readings and method used |
| After repairs or configuration changes | Affected grid, control response and normal schedule | Return-to-service evidence |
| At calibration due date | Instrument recalibration or replacement comparison | Certificate and continuity note |
Set a review trigger that the measurement method can resolve. A very narrow alarm band produces noise if sensor uncertainty or positioning variation is larger. Separate an immediate defect response from a gradual-performance investigation, and have the crop manager decide how to handle temporary light shortfalls.
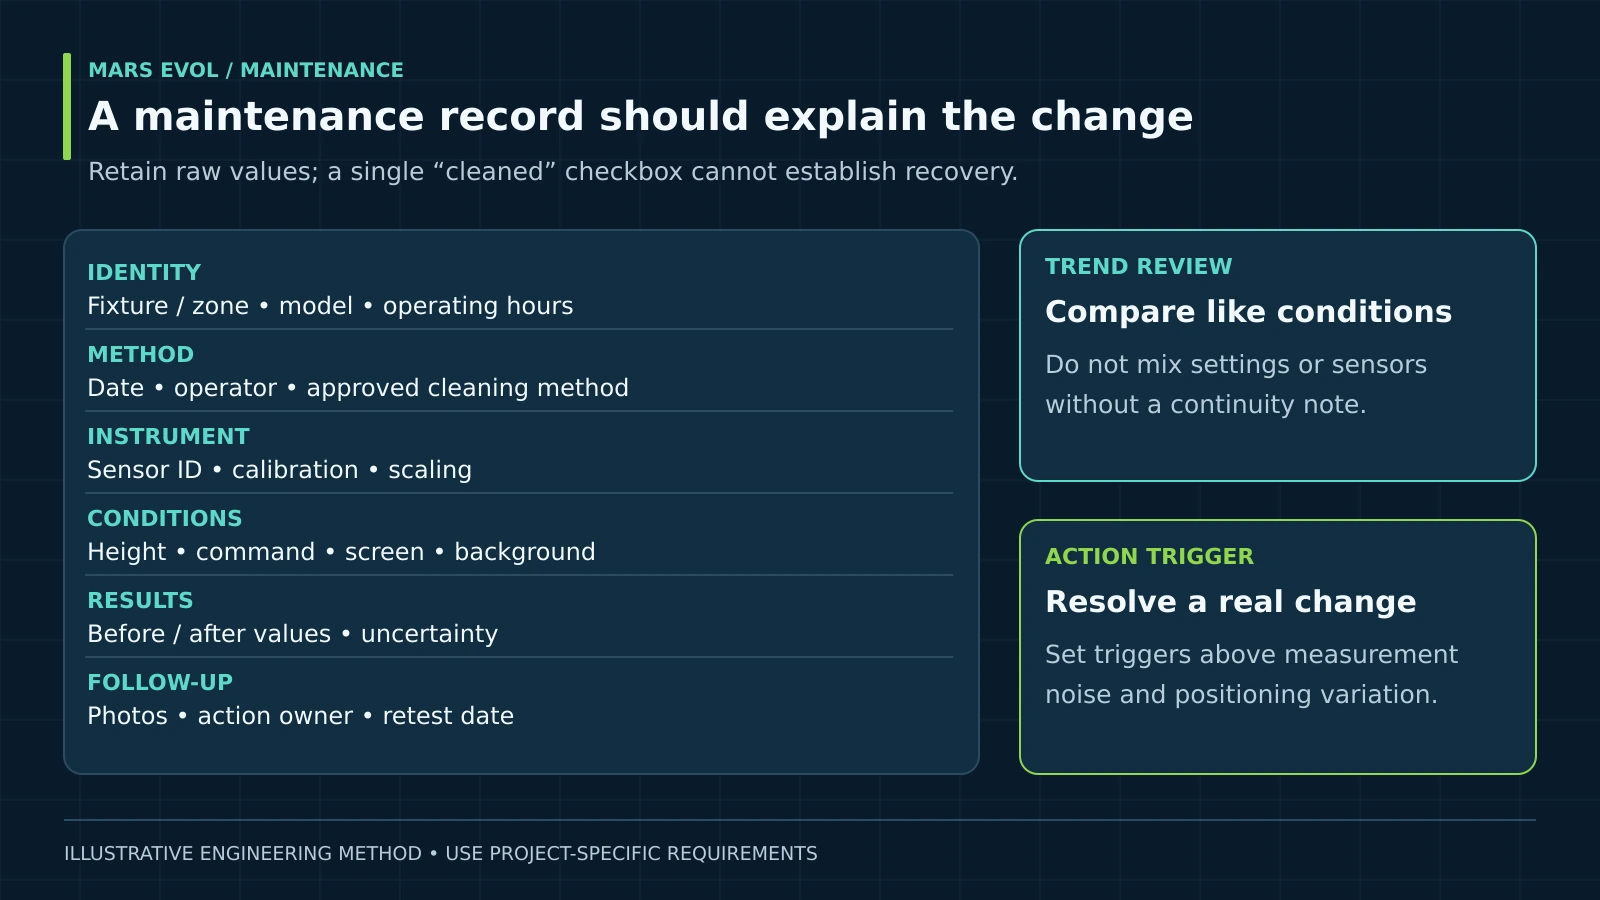
Keep operating hours, last cleaning date, method, operator, sensor ID, measurement conditions, results, photographs and follow-up action in one record. Trend by zone or model where meaningful. Increasing deposits should lead to a review of the maintenance interval or contamination source, not an automatic increase in fixture power.
Common LED grow light maintenance mistakes
- Cleaning a dirty sensor halfway through a comparison: this mixes measurement recovery with fixture recovery.
- Extending runtime to hide a loss: this may alter crop photoperiod and energy consumption without fixing the cause.
- Treating all plastics alike: an unsuitable cleaner can damage optical surfaces or seals.
- Replacing by wattage alone: verify distribution, spectrum and control compatibility before authorizing a substitute.
LED grow light maintenance FAQ
How often should greenhouse LEDs be cleaned?
Follow the exact model’s instructions and use inspection records to establish a site-specific interval. Dust, spray deposits, crop activities and access constraints determine when cleaning is useful and practicable.
Can an IP65 or IP66 fixture be pressure washed?
Do not infer an unrestricted cleaning procedure from the rating. Obtain the manufacturer’s permitted pressure, method, connector condition and chemical guidance for the supplied assembly before washing.
Should a five-percent light decrease trigger replacement?
Not by itself. First confirm repeatability, baseline conditions, instrument accuracy and settings. Replacement decisions need a persistent measured problem or a diagnosed equipment defect.
Is a lux meter enough for the maintenance survey?
Use an appropriate quantum sensor for PPFD comparisons. Lux weights light for human vision; a general lux-to-PPFD conversion can become misleading when spectrum or fixture variants differ.
Can the LEDs inside SOLIFY PRO be replaced on site?
The published manual states that its LED light sources are not user-serviceable or replaceable. Ask MarsEVOL for the authorized service route for the exact ordering code and retain warranty documentation.
MarsEVOL Perspective
We recommend connecting maintenance to the original acceptance record. For SOLIFY PRO installations, identify the specific fixture and driver version before requesting cleaning, connector or service guidance. Where information differs, resolve the discrepancy in writing for the supplied model before work begins.
Conclusion
LED grow light maintenance works best when it protects both the equipment and the reliability of the measurements. A clean instrument, an unchanged comparison state and a documented service action make performance trends useful instead of ambiguous.
Build a maintenance record for your greenhouse
Prepare fixture IDs, operating hours, current photographs and repeatable light readings so the next service discussion starts with evidence.
Explore More MarsEVOL Resources
Review the installation boundaries that qualified service personnel must preserve.
Track the effect of changed operating hours and measured input power.
References
- Apogee Instruments. SQ-500 Quantum Sensor Owner’s Manual. Revision April 23, 2026.
- LI-COR. LI-190R and LI-191R: Care and Maintenance. Accessed September 25, 2026.
- LI-COR. LI-190R and LI-191R: Factory Calibration. Accessed September 25, 2026.
- U.S. Department of Energy and Next Generation Lighting Industry Alliance. LED Luminaire Lifetime: Recommendations for Testing and Reporting. Third edition, September 2014.
- DesignLights Consortium. Horticultural Lighting Technical Requirements V4.0. Revised October 1, 2025.
- U.S. Occupational Safety and Health Administration. 29 CFR 1910.333: Selection and Use of Work Practices. Accessed September 25, 2026.
- MarsEVOL. SOLIFY PRO User Manual. Published manual, copyright 2022; model-specific instructions, page 3.